Use this to explain how to use your app | Flutter PRO tip #2

I am a software developer specialized in mobile apps. About a decade ago I started my career as a web developer, but I soon moved into Android native development; however for the last few years I've been building hybrid apps with Flutter. I consider myself a passionate programmer, I enjoy writing clean and scalable code. In addition to developing apps, I also have knowledge of backend services development, web development, installation and maintenance of servers, marketing applied to the growth of web applications... among other things. I also like to create video games in my free time and write about topics that interest me in the technology world: the last tech trends, experiments that I do, and topics regarding user privacy. You can find more about me, my articles and my projects on my website: davidserrano.io
Explain how to use your app to your users is key so that they understand how they can take advantage of its full potential and thus keep them as active users and increase retention rate.
Imagine you have the following application:
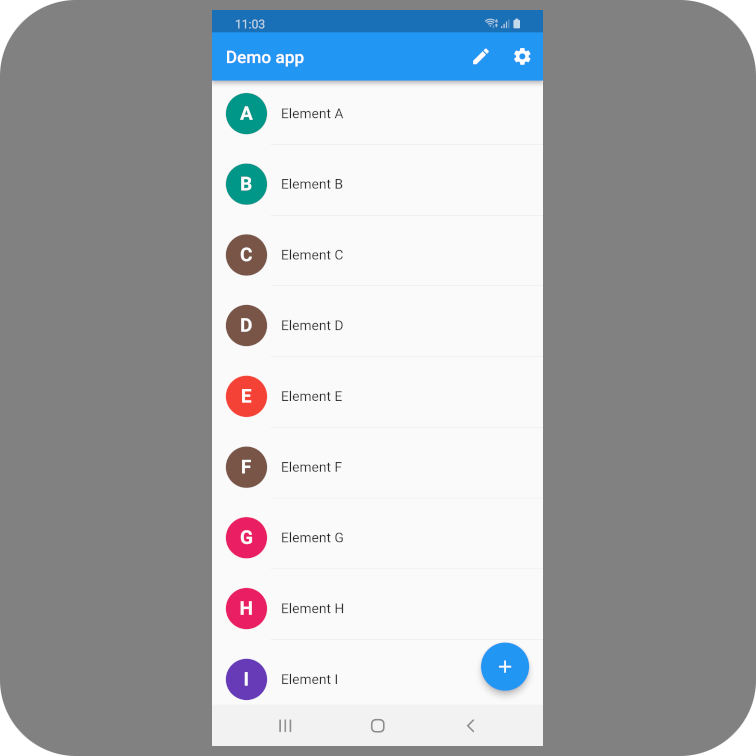
Your goal is to explain to the user what the bottom right floating button does, as well as the edit and adjust buttons that appear on the top bar. For this we are going to use the tutorial_coach_mark package:
flutter pub add tutorial_coach_mark
The first step will be to create a GlobalKey and add it to each widget you want to focus:
final GlobalKey _floatingButtonKey = GlobalKey();
final GlobalKey _editButtonKey = GlobalKey();
final GlobalKey _settingsButtonKey = GlobalKey();
Each step of the tutorial is represented by an object of type TargetFocus. We are going to create a method that creates a list of these elements and we are going to assign them the keys we just created:
@override
void initState() {
  super.initState();

  _createTutorial();
}

// [...]

Future<void> _createTutorial() async {
  final targets = [
    TargetFocus(
      identify: 'floatingButton',
      keyTarget: _floatingButtonKey,
      alignSkip: Alignment.topCenter,
      contents: [
        TargetContent(
          align: ContentAlign.top,
          builder: (context, controller) => Text(
            'Use this button to add new elements to the list',
            style: Theme.of(context)
                .textTheme
                .titleLarge
                ?.copyWith(color: Colors.white),
          ),
        ),
      ],
    ),
    TargetFocus(
      identify: 'editButton',
      keyTarget: _editButtonKey,
      alignSkip: Alignment.bottomCenter,
      contents: [
        TargetContent(
          align: ContentAlign.bottom,
          builder: (context, controller) => Text(
            'You can edit the entries by pressing on the edit button',
            style: Theme.of(context)
                .textTheme
                .titleLarge
                ?.copyWith(color: Colors.white),
          ),
        ),
      ],
    ),
    TargetFocus(
      identify: 'settingsButton',
      keyTarget: _settingsButtonKey,
      alignSkip: Alignment.bottomCenter,
      contents: [
        TargetContent(
          align: ContentAlign.bottom,
          builder: (context, controller) => Text(
            'Configure the app in the settings screen',
            style: Theme.of(context)
                .textTheme
                .titleLarge
                ?.copyWith(color: Colors.white),
          ),
        ),
      ],
    ),
  ];
}
Now we are going to create a TutorialCoachMark type object where we are going to pass this list of targets. Then we will show the tutorial:
Future<void> _createTutorial() async {
  // [...]

  final tutorial = TutorialCoachMark(
    targets: targets,
  );

  Future.delayed(const Duration(milliseconds: 500), () {
    tutorial.show(context: context);
  });
}
And this is the final result:
For the tutorial to display correctly it is important that the entire UI is loaded and ready, so a delay is used to call the show() method:
Future.delayed(const Duration(milliseconds: 500), () {
  tutorial.show(context: context);
});
You can use the shared_preferences plugin or any other mechanism to control that this tutorial is only displayed the first time the user opens the application.
You can visit this package's page on pub.dev to learn more details about the various configuration options it offers.
You have the complete source code available here.
Thank you for reading this far!
Emoji icons created by Freepik - Flaticon: https://www.flaticon.com/free-icons/emoji