Game Programming Patterns in Godot: The Command Pattern
I am a software developer specialized in mobile apps. About a decade ago I started my career as a web developer, but I soon moved into Android native development; however for the last few years I've been building hybrid apps with Flutter. I consider myself a passionate programmer, I enjoy writing clean and scalable code. In addition to developing apps, I also have knowledge of backend services development, web development, installation and maintenance of servers, marketing applied to the growth of web applications... among other things. I also like to create video games in my free time and write about topics that interest me in the technology world: the last tech trends, experiments that I do, and topics regarding user privacy. You can find more about me, my articles and my projects on my website: davidserrano.io
Have you ever been playing an adventure game and suddenly lost control of your character because a cutscene starts, revealing more of the story? Or in a strategy game or map editor, have you had the option to undo a recent action?
You've probably come across these situations many times, but have you ever wondered how they're coded? Is all that extra logic stuffed into the Player class?
In this article, I'll dive into a popular design pattern that's super handy for these scenarios: the Command pattern.
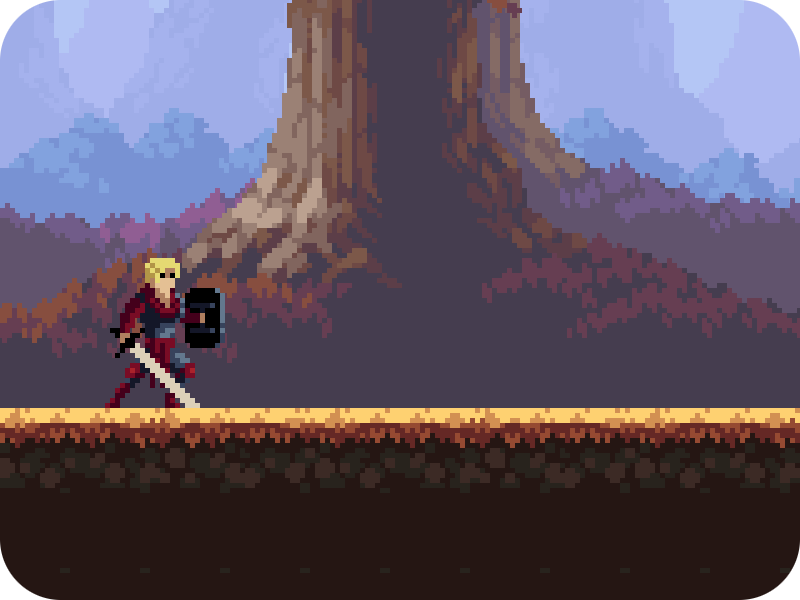
This design pattern lets us wrap a request as an object, offering a range of flexibilities and capabilities I'll walk you through. I have created this example in which we can control a character, making him move and attack.
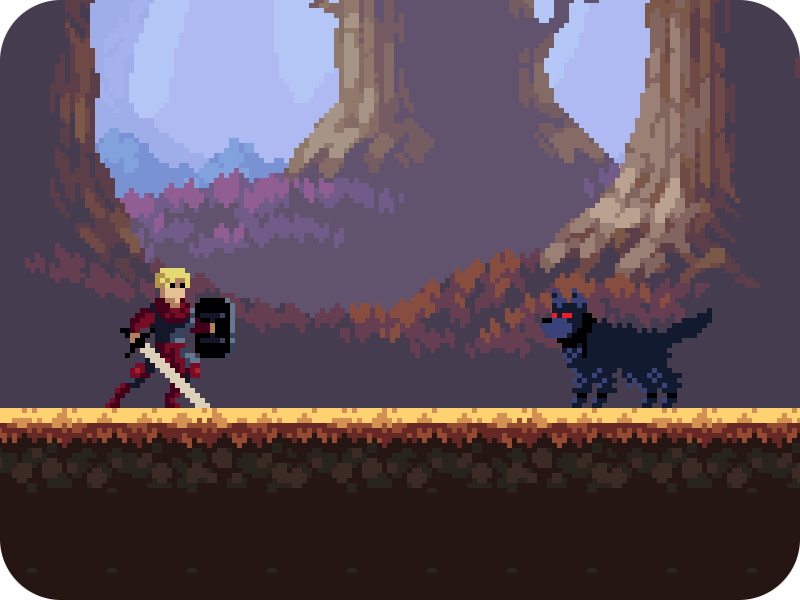
But I want that when he meets this wolf, I want an AI to take over, approach the wolf, and attack. Think of this as a cutscene where we want the main character to act out a specific part of the story. This could be followed by some kind of dialogue or anything else.
Now, you might think about cramming all this logic into the Player class. But that's not ideal since it mixes responsibilities and further bloats one of the typically largest classes in gaming, which is the Player class.
This design pattern is eloquently detailed in a book called "Game Programming Patterns". I highly recommend reading it, since it provides an exhaustive review of several design patterns in software development applied to video game development, with code examples, explanations and insights on each pattern. While it's available online if you prefer physical copies as I do, here's a link for you to purchase it in case you are interested (Disclosure: As an Amazon Associate I earn from qualifying purchases).
So if you are interested in learning how to use this design pattern in Godot to achieve cleaner, tidier, and more efficient code, keep reading!
Creating the Commands
Command
In the example I created, I am using the classic method to control the character, for example, if I want to get the input value to move it left or right:
var movement_input = Input.get_action_strength("move_right") - Input.get_action_strength("move_left")
Or if I want to detect if the attack key has been pressed:
Input.is_action_just_pressed("attack")
The idea is to replace all of this so that this logic is outside of the Player class.
To do this, the first thing we must create is the Command class:
class_name Command
extends Object


func execute(player: Player, data: Object = null) -> void:
    pass
This class defines an execute() method in which it receives a Player instance and an optional "data" argument. The goal of this method is to execute the appropriate action on the Player. Note that at this point we are coupling this Command to the Player, making it unable to be used by any other entity. I do this to keep this tutorial as simple as possible, but in a real case instead of the Player, you could receive a base class from which all your actors inherit.
MovementCommand
Now we are going to create the command that will allow the player to move:
class_name MovementCommand
extends Command


class Params:
    var input: float

    func _init(input: float) -> void:
        self.input = input


func execute(player: Player, data: Object = null) -> void:
    if data is Params:
        player.move(data.input)
We create the MovementCommand class that inherits from Command, and we set a Params class where we are going to indicate the direction of movement using a float value, -1 for left, 0 for staying still, and 1 for moving to the right.
In the execute method what we have to do is call the appropriate Player method to perform the move.
AttackCommand
We do the same for the attack command, but in this case it won't be necessary to create any class parameters since we do not need to know anything else:
class_name AttackCommand
extends Command


func execute(player: Player, _data: Object = null):
    player.attack()
Creating the controllers
Now that we have the necessary commands created, we need something to issue them. I'm going to call this concept "Controller". The idea is to have a base class, and extend it to allow the player to control the character, and another to make the AI control it.
PlayerController
Let's start by creating the PlayerController base class:
class_name PlayerController
extends Node


var player: Player

var movement_command := MovementCommand.new()
var attack_command := AttackCommand.new()


func _init(player: Player) -> void:
    self.player = player
As you can see, this class maintains a reference to Player and instantiates each of the relevant commands. We make this class inherit from Node since we are going to have to interact with the game loop.
HumanController
This is when you will see how everything takes shape. We create HumanController with the following content:
class_name HumanController
extends PlayerController


func _physics_process(_delta):
    var movement_input = Input.get_action_strength("move_right") - Input.get_action_strength("move_left")

    if Input.is_action_just_pressed("attack"):
        attack_command.execute(player)
    else:
        movement_command.execute(player, MovementCommand.Params.new(movement_input))
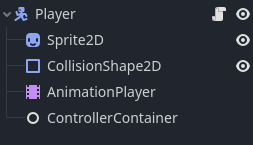
The idea will be to add this node as a child of the Player, this way we can detect the user's input and execute the appropriate command. To do this, we will first have to create a container for this or any other controller:
Now we will add the following logic to the Player class:
# Maintain a reference to the current controller
var _controller: PlayerController

# Reference to the container that will contain the controller node
@onready var _controller_container = $ControllerContainer

# By default, we create a HumanController
func _ready() -> void:
    set_controller(HumanController.new(self))

# We added this method to allow changing the active controller
func set_controller(controller: PlayerController) -> void:
    # Delete all previous controllers
    for child in _controller_container.get_children():
        child.queue_free()

    _controller = controller
    _controller_container.add_child(_controller)
At this point, if everything has gone well, we should be able to run the game and control the main character as we did before.
AiController
Next, we are going to create another class that inherits from PlayerController, but this time we will create a custom AI that will send the following commands:
class_name AiController
extends PlayerController


var _init_time: int = 0
var _is_attack_end: bool = false


func _ready():
    _init_time = Time.get_ticks_msec()


func _physics_process(_delta):
    var current_time = Time.get_ticks_msec() - _init_time

    if current_time < 3000:
        movement_command.execute(player, MovementCommand.Params.new(0.0))
    elif current_time < 3900:
        movement_command.execute(player, MovementCommand.Params.new(1.0))
    elif not _is_attack_end:
        attack_command.execute(player)
    else:
        movement_command.execute(player, MovementCommand.Params.new(0.0))

# In this example, the player class will tell this controller that
# the attack has ended. As I say, it's a quick example,
# there are better ways to manage this.
func on_attack_end():
    _is_attack_end = true
In this example, the code that I have put inside _physics_process() is completely orientational. I recommend that you use more sophisticated mechanisms so that your AI is accurate, but I think you can already see the benefit that the Command pattern brings us.
Let AI take control
The last step we have left is to decide at what point the AI will take control of the character. For example, we could create an Area2D and add the following script to it:
extends Area2D


func _on_body_entered(body):
    if body is Player:
        body.set_controller(AiController.new(body))
When the character touches this area, the controller will be changed from HumanController to AiController, and from that point on it will be our logic that will control the character's actions.
The benefits of the Command pattern
As you have seen, we have just managed to decouple the control of the character from the Player class. Through this mechanism we can obtain other benefits, not only being able to control the player in the cutscenes, but also for example that the player begins to control an enemy, or conversely that an enemy begins to control the player.
Furthermore, one of the most widespread uses of this pattern is to be able to redo actions. If you think about it, we're encapsulating each action in a Command object, so we could store all of these objects and then be able to go back and redo actions already performed.
I hope you found this article useful, we'll see in the next one.
Happy coding!