AdMob UMP SDK in Flutter - Implement your GDPR dialog
Learn how to add the AdMob consent dialog using the User Messaging Platform SDK in your Flutter app
I am a software developer specialized in mobile apps. About a decade ago I started my career as a web developer, but I soon moved into Android native development; however for the last few years I've been building hybrid apps with Flutter. I consider myself a passionate programmer, I enjoy writing clean and scalable code. In addition to developing apps, I also have knowledge of backend services development, web development, installation and maintenance of servers, marketing applied to the growth of web applications... among other things. I also like to create video games in my free time and write about topics that interest me in the technology world: the last tech trends, experiments that I do, and topics regarding user privacy. You can find more about me, my articles and my projects on my website: davidserrano.io
AdMob is going to start requiring all publishers to use a Google-certified Consent Management Platform (CMP) to request data usage consent under the General Data Protection Regulation (GDPR), as explained in this article of their help center.
In this article, I am going to explain how to comply with this new policy using Google's own CMP, which is a free library that, although it has its flaws, will at least allow us to comply with this new regulation.
Through this Flutter tutorial you will learn how to do the following:
How to ask for consent the first time the user starts the application
How to allow the user to modify their privacy preferences per the GDPR
How to manage the expiration of consent to request it again when necessary
To implement this, you only need to have the google_mobile_ads plugin installed. If you already display ads in your app, you should have this plugin already. While there are other plugins for showing this consent message, the latest google_mobile_ads versions come with the right SDK, so there's no need for third-party plugins.
Create the AdMob UMP message in the console
The first step we must take is to create the consent message in the AdMob interface. If you already have this message created then simply go to the next step.
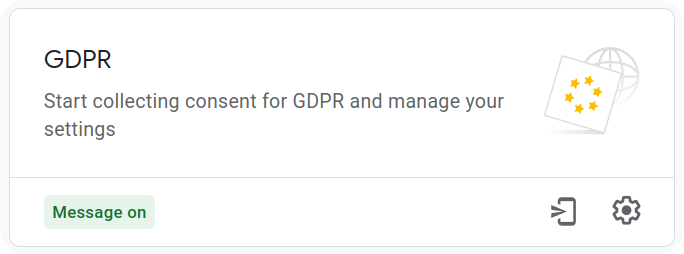
Access the AdMob console, and go to the Privacy & messaging section:

Here you will see the different types of messages that you can create. Press the first button at the bottom right to create your message:
In the next screen, press the Create message button to start creating your message.
You will be presented with a form with several options. First, choose all the apps that you want to apply this message to. Here you should choose the applications that serve ads to users from the European Union. Keep in mind that if you want to apply different styles (colors, fonts) you will have to create more than one message.
Then choose the languages in which you want to display the message, and the consent options:
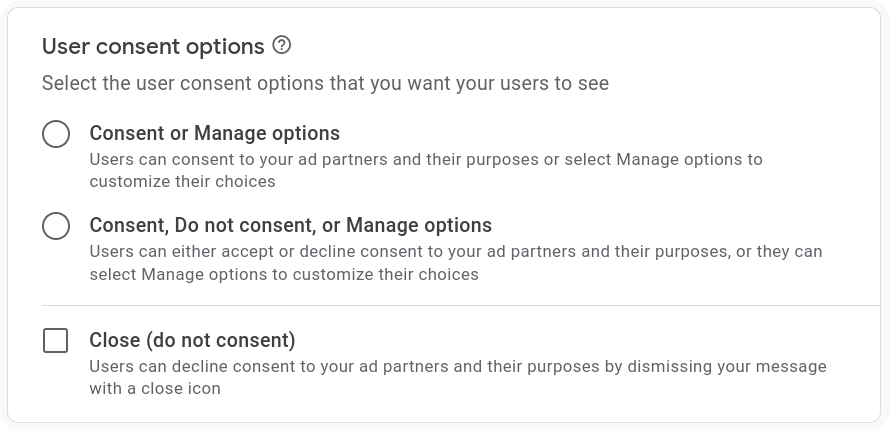
If you have doubts about which option is right for you, you should consult with a lawyer specialized in this topic. For my applications I have chosen the option Consent, Do not consent, or Manage options to ensure that I offer a clear, easy and free way for my users to not consent to the use of data; but as I say, I am not a lawyer and this is not legal advice, so please consult a professional who can guide you in your particular case.
The last step will be to choose whether we want to show this message only in regions subject to the GDPR or worldwide.
Once created you will be able to view and configure your message. At this point, I advise you to navigate through the interface since there are several configuration options, including the selection of colors, languages, spacing, etc. Simply configure the message to your liking so that it looks good in your application.
ℹ If you have more questions about the process of creating the privacy message, I recommend that you look at the official AdMob guide, where you will find the details of all the settings.
Create a class that manages the GDPR dialog
The Google UMP SDK can be integrated directly into any point of your application, however in this tutorial what we are going to do is create our own class that will manage it and then a screen that will use this class.
The reason I do it this way is that the first time a user starts your app after downloading it is a sensitive moment, and I think showing this message right at the beginning gives a bad user experience.
On the other hand, each successive app launch will require us to look at the consent status and see if we need to display the message, this can happen for various reasons:
The first time the user opened the app, the device had no internet connection, so the message could not be displayed
The message has been modified and must be displayed again
Consent status has expired
In these cases, we are going to have to show the message right when the application starts.
To cover all these needs, what I do is create a class that specializes in displaying this message and a screen that uses it. This gives us the flexibility to be able to display this message in different situations that you will see throughout this tutorial.
Create an initialization_helper.dart file with the following content:
import 'package:google_mobile_ads/google_mobile_ads.dart';

class InitializationHelper {
  void initialize() {
    final params = ConsentRequestParameters();
    ConsentInformation.instance.requestConsentInfoUpdate(params, () async {
      if (await ConsentInformation.instance.isConsentFormAvailable()) {
        // Here we'll load the consent form
      }
    }, (error) {
      // Manage error
    });
  }
}
In this method, we request the consent status, and if a form is available we will proceed to display it. The isConsentFormAvailable() method will only return true in cases where there is a form to display, if the user is outside of the countries subject to the GDPR this method will return false, although this behavior may vary depending on how you have configured the message.
Now we will create a private method that loads and displays the message:
  void _loadConsentForm() {
    ConsentForm.loadConsentForm((consentForm) async {
      final status = await ConsentInformation.instance.getConsentStatus();
      if (status == ConsentStatus.required) {
        consentForm.show((formError) {
          // Call this method again, if the user has already selected an
          // option the message will not be displayed again.
          _loadConsentForm();
        });
      }
    }, (FormError? error) {
      // Handle error
    });
  }
If you've noticed, this library doesn't use Futures to do asynchronous work but instead uses callbacks. This is not a very "Flutter" way of doing things, so we're going to "Flutterize" it using a Completer. In addition, we are going to add another method that will be in charge of initializing the consent-dependent components:
import 'dart:async';

  // [...]

  Future<FormError?> _loadConsentForm() async {
    final completer = Completer<FormError?>();

    ConsentForm.loadConsentForm((consentForm) async {
      final status = await ConsentInformation.instance.getConsentStatus();
      if (status == ConsentStatus.required) {
        consentForm.show((formError) {
          completer.complete(_loadConsentForm());
        });
      } else {
        // The user has chosen an option,
        // it's time to initialize the ads component.
        await _initialize();
        completer.complete();
      }
    }, (FormError? error) {
      completer.complete(error);
    });

    return completer.future;
  }

  Future<void> _initialize() async {
    await MobileAds.instance.initialize();

    /**
     * Here you can place any other initialization of any
     * other component that depends on consent management,
     * for example the initialization of Google Analytics
     * or Google Crashlytics would go here.
     */
  }
We are now going to also use a Completer in the initialize() method, and also manage the initialization of the components:
  Future<FormError?> initialize() async {
    final completer = Completer<FormError?>();

    final params = ConsentRequestParameters();
    ConsentInformation.instance.requestConsentInfoUpdate(params, () async {
      if (await ConsentInformation.instance.isConsentFormAvailable()) {
        await _loadConsentForm();
      } else {
        // There is no message to display,
        // so initialize the components here.
        await _initialize();
      }

      completer.complete();
    }, (error) {
      completer.complete(error);
    });

    return completer.future;
  }
The next step is to create a screen that the previous class will use to manage consent. We will place a loading to give feedback to the user that something is happening while the consent status and message are loading:
Create the file initialize_screen.dart with the following content:
import 'package:admob_consent_dialog/initialization_helper.dart';
import 'package:flutter/material.dart';

class InitializeScreen extends StatefulWidget {
  final Widget targetWidget;

  const InitializeScreen({required this.targetWidget});

  @override
  State<InitializeScreen> createState() => _InitializeScreenState();
}

class _InitializeScreenState extends State<InitializeScreen> {
  final _initializationHelper = InitializationHelper();

  @override
  void initState() {
    super.initState();

    _initialize();
  }

  @override
  Widget build(BuildContext context) => const Scaffold(
        body: Center(
          child: CircularProgressIndicator(),
        ),
      );

  Future<void> _initialize() async {
    final navigator = Navigator.of(context);

    WidgetsBinding.instance.addPostFrameCallback((_) async {
      await _initializationHelper.initialize();
      navigator.pushReplacement(
        MaterialPageRoute(builder: (context) => widget.targetWidget),
      );
    });
  }
}
Where to display the AdMob consent dialog
We can now use the created elements in the appropriate places. This varies from application to application, but as a suggestion, I can tell you what I do:
The first time the user opens the application, the first thing I show them is an onboarding screen where I explain the strengths of my application. Once the onboarding is complete, I direct the user to the
InitializeScreen, passing the main screen of my application in thetargetWidgetparameter.If this is not the first time the user opens the application, the first screen I show is
InitializeScreen, in case it is necessary to show the message again.
It is important to keep in mind that the message will only be displayed according to the configuration we have chosen. For those users residing in countries not subject to the GDPR, what they will see is simply a short screen with a central loading. In iOS, if we have also configured the IDFA explanatory message, it may be displayed.
To verify that the implementation you have made works correctly we can alter the ConsentRequestParameters object in initialization_helper.dart as follows to simulate a location:
final params = ConsentRequestParameters(
  consentDebugSettings: ConsentDebugSettings(
    debugGeography: DebugGeography.debugGeographyEea,
    // Or DebugGeography.debugGeographyNotEea to simulate outside of the EEA
  ),
);
I recommend that you do the following tests to verify that everything is going well:
Launch your newly installed app by forcing the location to be within the European Union: The message should be displayed.
Launch your newly installed app by forcing the location to be outside the European Union: The message should not be displayed (unless you have set it to worldwide).
Launch your newly installed app by forcing the location to be within the European Union, but REMOVE the internet connection, the message will not be able to be displayed. Then reconnect to the internet and start the application, the message should be displayed at startup.
Another thing you should try is to reset the consent state, you can do this by running the following:
ConsentInformation.instance.reset();
Restart the app and verify that the message appears.
Allow the user to modify their privacy options
The GDPR dictates that users must be able to modify any previously made choices, so we should add a button somewhere in our app (I have it in the settings screen, specifically in the legal section, next to the privacy policy) so that the user can reopen this consent message and modify their preferences.
To do this we will have to create a new method that allows us to open the consent dialog, but that has a somewhat different behavior from the previous initialization method.
Add this method to initialization_helper.dart:
Future<bool> changePrivacyPreferences() async {
  final completer = Completer<bool>();

  ConsentInformation.instance
      .requestConsentInfoUpdate(ConsentRequestParameters(), () async {
    if (await ConsentInformation.instance.isConsentFormAvailable()) {
      ConsentForm.loadConsentForm((consentForm) {
        consentForm.show((formError) async {
          await _initialize();
          completer.complete(true);
        });
      }, (formError) {
        completer.complete(false);
      });
    } else {
      completer.complete(false);
    }
  }, (error) {
    completer.complete(false);
  });

  return completer.future;
}
If you look, this method is very similar to the previous one, but in this case once the user has made a decision we do not try to open the dialog again.
Allowing the user to change their privacy preferences only makes sense for users in countries subject to the GDPR. If you look at the official Google SDK documentation you will see that we are not provided with any explicit method to check this, however all parameters, including whether the user is under the GDPR, are stored in the local preferences by the SDK.
Specifically, the IABTCF_gdprApplies key contains a value of 1 if the user is under the GDPR. However, the problem of accessing this value can come if you use a plugin like shared_preferences. This plugin, undoubtedly the most famous in the Flutter world for saving/reading local preference values, has the drawback that in its default configuration it adds a prefix to all keys. For that reason, if you try to access the value I mentioned, you will get a null, even if that value exists.
In this case, I recommend using any other mechanism to read the preferences without anything altering the keys. For this tutorial, I am going to use async_preferences, a plugin created by me that does not alter the keys used in the preferences in any way. You can install it using this command:
flutter pub add async_preferences
Below I show you an example code of a very simple settings screen where one of the options allows the user to reopen the consent dialog:
import 'package:admob_consent_dialog/initialization_helper.dart';
import 'package:async_preferences/async_preferences.dart';
import 'package:flutter/material.dart';

class SettingsScreen extends StatefulWidget {
  const SettingsScreen({super.key});

  @override
  State<SettingsScreen> createState() => _SettingsScreenState();
}

class _SettingsScreenState extends State<SettingsScreen> {
  final _initializationHelper = InitializationHelper();

  // We will use a Future to read the setting that
  // tells us if the user is under the GDPR
  late final Future<bool> _future;

  @override
  void initState() {
    super.initState();

    _future = _isUnderGdpr();
  }

  @override
  Widget build(BuildContext context) => Scaffold(
        appBar: AppBar(
          title: const Text('Settings'),
        ),
        body: FutureBuilder(
          future: _future,
          builder: (context, snapshot) => ListView(
            children: [
              // Show it only if the user is under the GDPR
              if (snapshot.hasData && snapshot.data == true)
                ListTile(
                  title: const Text('Change privacy preferences'),
                  onTap: () async {
                    final scaffoldMessenger = ScaffoldMessenger.of(context);

                    // Show the consent message again
                    final didChangePreferences =
                        await _initializationHelper.changePrivacyPreferences();

                    // Give feedback to the user that their
                    // preferences have been correctly modified
                    scaffoldMessenger.showSnackBar(
                      SnackBar(
                        content: Text(
                          didChangePreferences
                              ? 'Your privacy choices have been updated'
                              : 'An error occurred while trying to change your privacy choices',
                        ),
                      ),
                    );
                  },
                ),
            ],
          ),
        ),
      );

  Future<bool> _isUnderGdpr() async {
    // Initialize AsyncPreferences and checks if the IABTCF_gdprApplies
    // parameter is 1, if it is the user is under the GDPR,
    // any other value could be interpreted as not under the GDPR
    final preferences = AsyncPreferences();
    return await preferences.getInt('IABTCF_gdprApplies') == 1;
  }
}
`
Conclusion
As you can see, both in order to comply with the different privacy laws and to comply with the AdMob policy, there are many factors to take into account and several actions to take.
I hope this indicative tutorial has been useful to you, remember that it is simply an example of how to do it, and in your case you should adapt the solution that I propose here to your application.
We'll see in the next article,
Happy coding!