Build a Video Chat app in Flutter in less than 5 minutes

I am a software developer specialized in mobile apps. About a decade ago I started my career as a web developer, but I soon moved into Android native development; however for the last few years I've been building hybrid apps with Flutter. I consider myself a passionate programmer, I enjoy writing clean and scalable code. In addition to developing apps, I also have knowledge of backend services development, web development, installation and maintenance of servers, marketing applied to the growth of web applications... among other things. I also like to create video games in my free time and write about topics that interest me in the technology world: the last tech trends, experiments that I do, and topics regarding user privacy. You can find more about me, my articles and my projects on my website: davidserrano.io
Creating a live video platform is not an easy task. You have to manage the transmission of the video and audio signal, manage its encoding and decoding, as well as to apply complex compression algorithms to adjust the bandwidth so that the streaming is seen correctly. In addition to all this, you have to maintain expensive media servers that are responsible for transforming the input formats to various output formats, adjusting the bitrate according to the client, etc.
Luckily, today we have different solutions to be able to abstract ourselves from all this complexity and build our live video application quickly and easily, and that is the case of ZEGOCLOUD, a company whose product will allow us to create in a few minutes a video and audio streaming solution with very little configuration required and pre-built interface elements.
Full disclosure: this article is sponsored by ZEGOCLOUD. This company contacted me to see if I could write an article showing their product, I tried their UIKits and I saw how easy and fast one can create a live-video app, so I decided to work with them to bring this tutorial to you.
In this article, I am going to show you how to build a Video-Chat application in Flutter in less than 5 minutes using one of its products, the UIKits, which will allow us to add a pre-built widget with all the typical components of this type of applications.
Setup project in ZEGOCLOUD
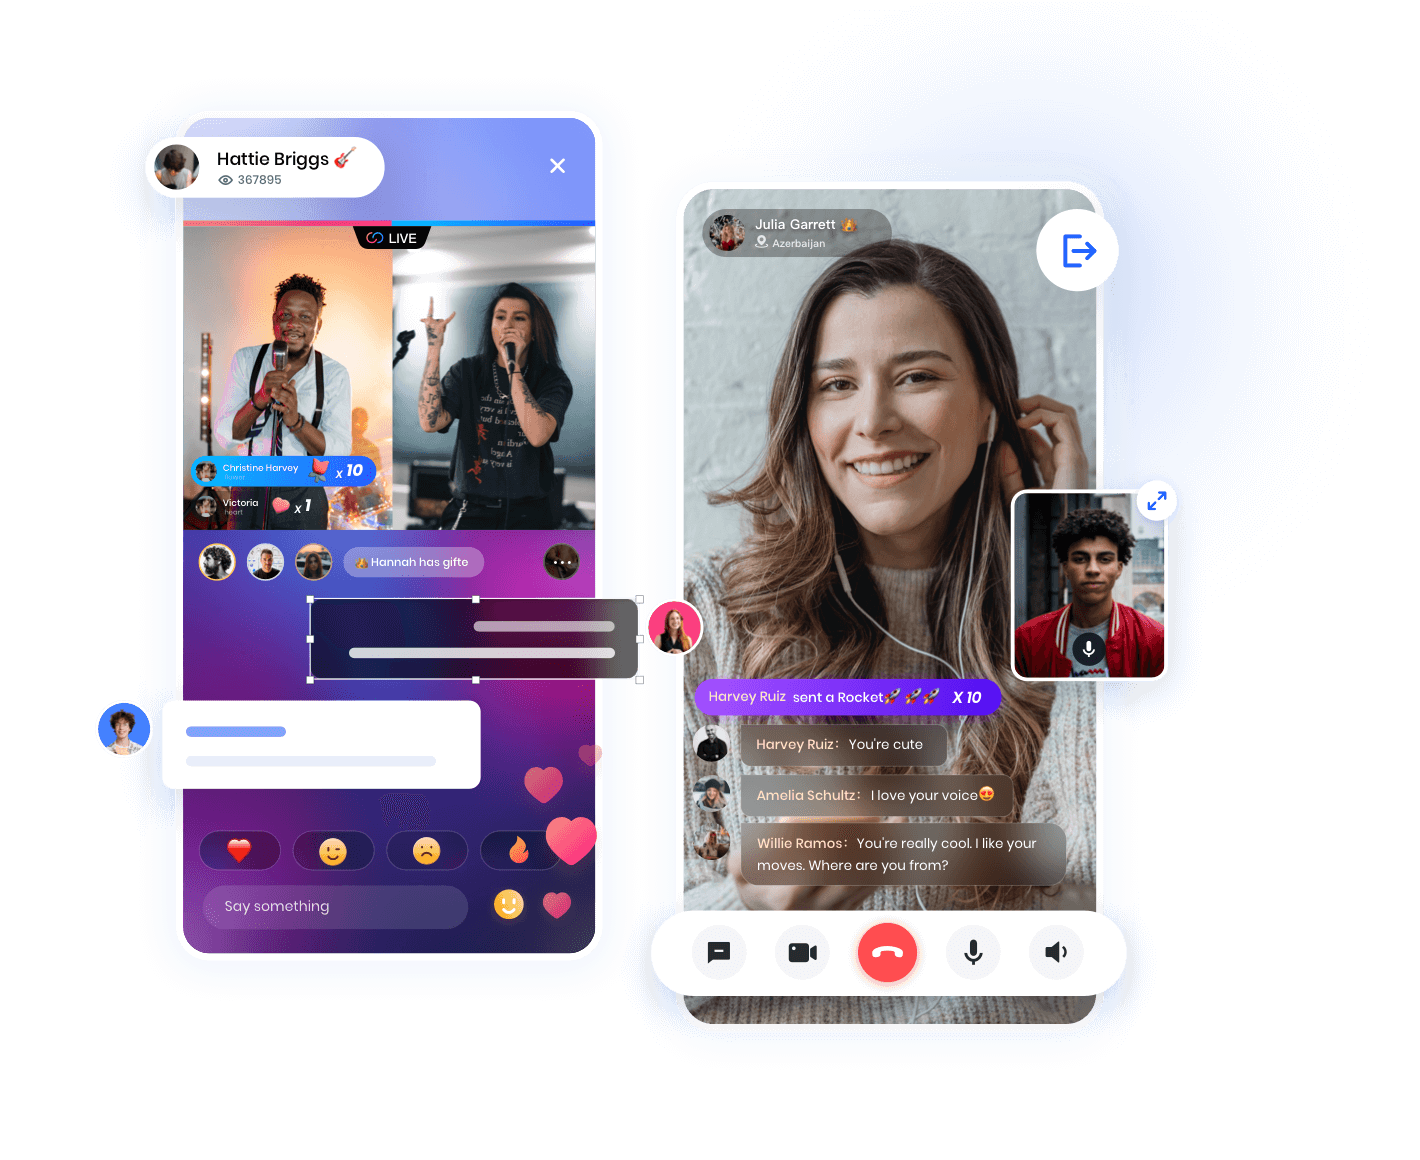
The first step will be to go to their UIKit page, where we can see a preview of what we are going to build next:
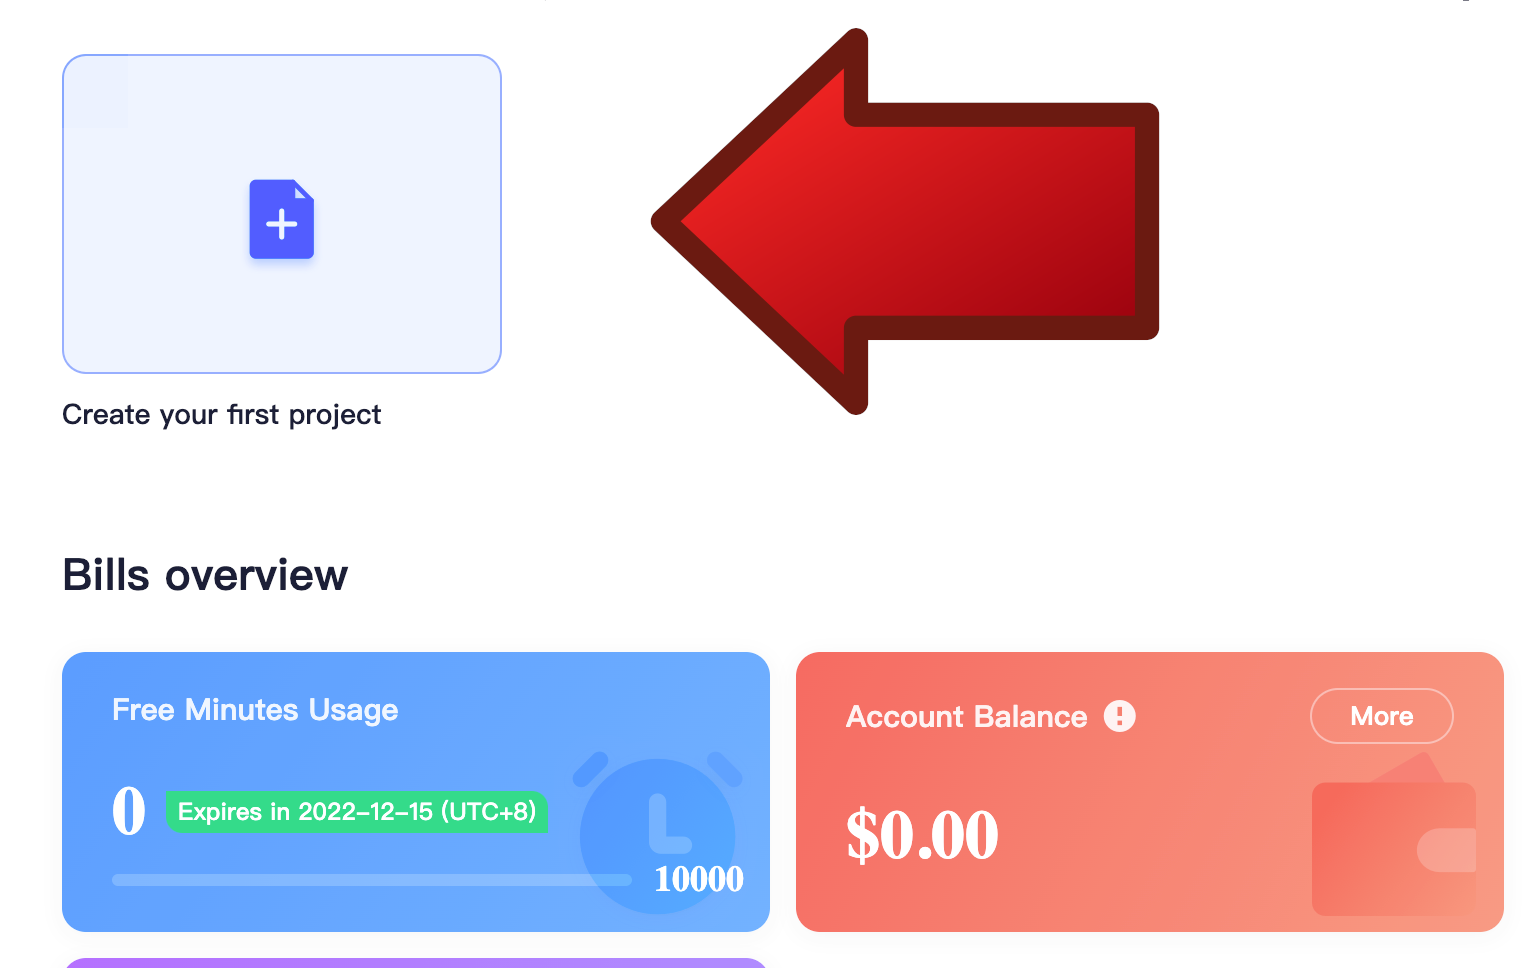
We will click on Start building now and we will register to be able to create the project. Once we have completed this process we will be directed to the ZEGOCLOUD dashboard, click on Create your first project to start building your new app:
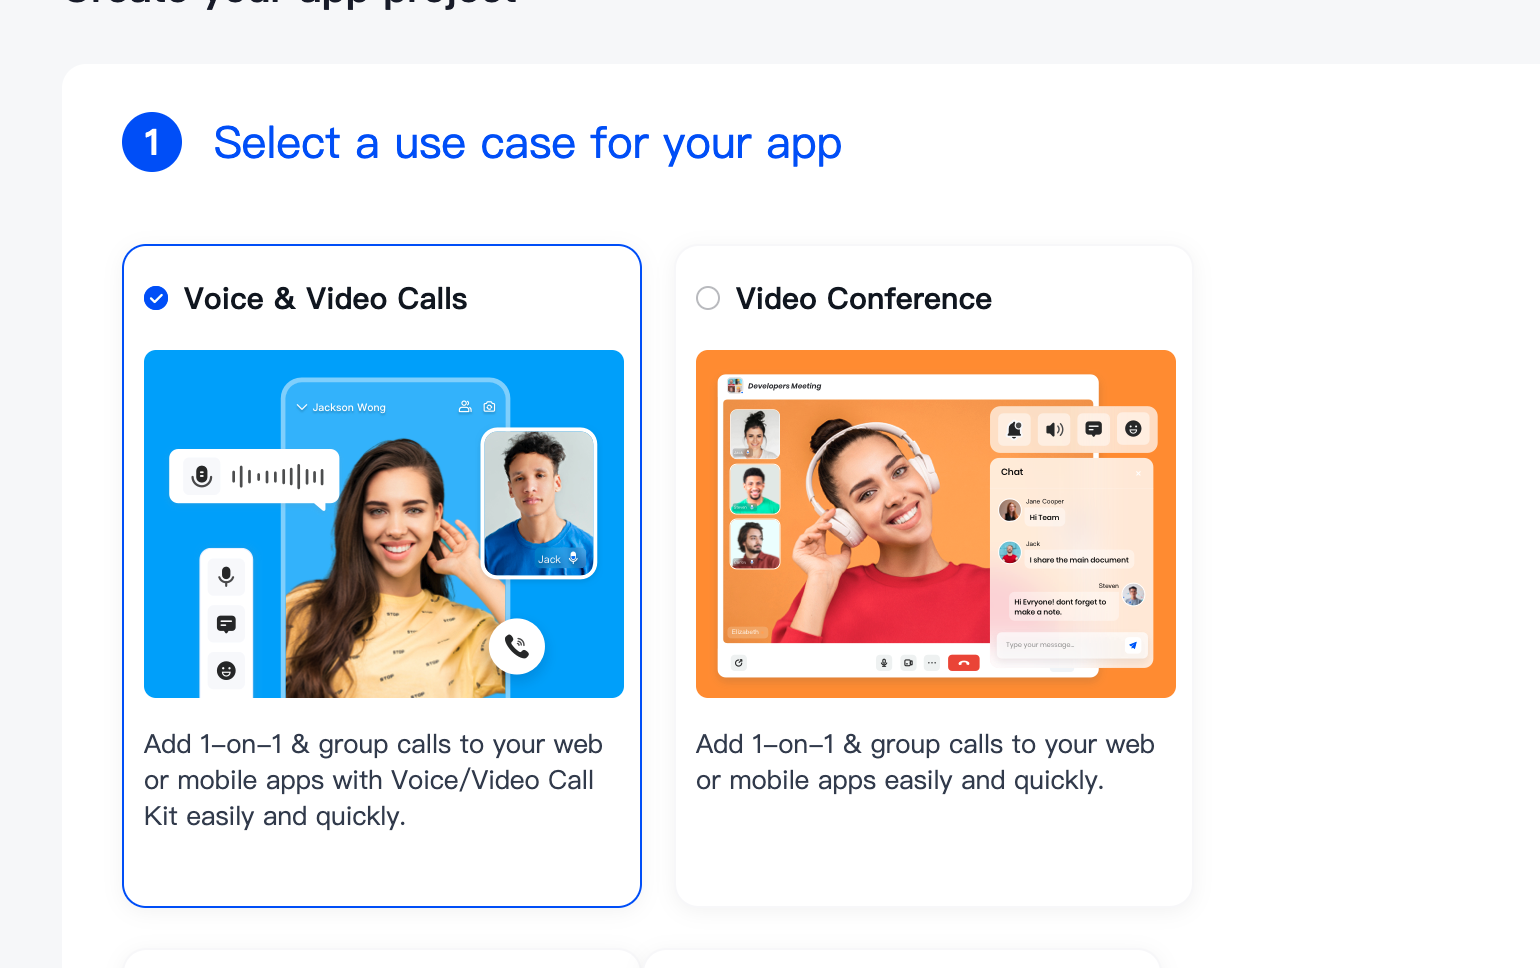
Now you will see a list of use cases that you can choose, depending on which one you choose, the dashboard will offer you a pre-built kit or another.
For this example we are going to select Voice & Video Calls:
In step 2 we will be able to enter a name for the project, right after we will be given the option to use a pre-built UIKit or to use the SDK to completely customize the UI of our application.
For this example, we are going to select Start with UIKits since what we want is to have our app up and running as quickly as possible.
Once the project is generated, we select the For Flutter option, in the next step we can customize the feature that we want to implement. We leave the default values and click on the blue button at the bottom right labeled Save & Start to integrate.
Then we will obtain our AppID and our AppSign, essential elements that we will have to use later with the UIKit that we have selected.
Everything is ready to start building our video chat application!
Create Flutter App
Create a new application whose platforms will be Android and iOS:
flutter create --platforms android,ios flutter_video_chat
Before adding code, we need to review some configuration settings, make sure to apply the following values in the android block in android/app/build.gradle:
android {
    compileSdkVersion 33 // Make sure to compile against API 33
    ndkVersion flutter.ndkVersion

    compileOptions {
        sourceCompatibility JavaVersion.VERSION_1_8
        targetCompatibility JavaVersion.VERSION_1_8
    }

    kotlinOptions {
        jvmTarget = '1.8'
    }

    sourceSets {
        main.java.srcDirs += 'src/main/kotlin'
    }

    defaultConfig {
        applicationId "com.example.flutter_video_chat"
        minSdkVersion 22 // Set the minimum SDK to 22
        targetSdkVersion 33 // We also target SDK 33
        versionCode flutterVersionCode.toInteger()
        versionName flutterVersionName
    }

    buildTypes {
        release {
            signingConfig signingConfigs.debug
        }
    }
}
We also need to declare some permissions required in android/app/src/main/AndroidManifest.xml in order to be able to create the video chat:
<uses-permission android:name="android.permission.ACCESS_WIFI_STATE" />
<uses-permission android:name="android.permission.RECORD_AUDIO" />
<uses-permission android:name="android.permission.INTERNET" />
<uses-permission android:name="android.permission.ACCESS_NETWORK_STATE" />
<uses-permission android:name="android.permission.CAMERA" />
<uses-permission android:name="android.permission.BLUETOOTH" />
<uses-permission android:name="android.permission.MODIFY_AUDIO_SETTINGS" />
<uses-permission android:name="android.permission.WRITE_EXTERNAL_STORAGE" />
<uses-permission android:name="android.permission.READ_PHONE_STATE" />
<uses-permission android:name="android.permission.WAKE_LOCK" />
In the native iOS part (ios/Runner/Info.plist) we will also have to declare the use of the camera and microphone permission:
<key>NSCameraUsageDescription</key>
<string>We require camera access to connect to a call</string>
<key>NSMicrophoneUsageDescription</key>
<string>We require microphone access to connect to a call</string>
Now add the necessary dependencies, which are the ZEGOCLOUD UIKit package and the uuid package that we will use to generate a user identifier:
flutter pub add zego_uikit_prebuilt_call uuid
First of all we will create a very simple widget in charge of asking the user to enter the name they want to use in the chat. Create a new file in lib/request_username.dart and add the following code:
import 'package:flutter/material.dart';

typedef UsernameSelected = Function(String username);

class RequestUsername extends StatefulWidget {
  final UsernameSelected onUsernameSelected;

  const RequestUsername({
    super.key,
    required this.onUsernameSelected,
  });

  @override
  State<RequestUsername> createState() => _RequestUsernameState();
}

class _RequestUsernameState extends State<RequestUsername> {
  final _formKey = GlobalKey<FormState>();
  final _textController = TextEditingController();

  @override
  Widget build(BuildContext context) => Form(
        key: _formKey,
        child: Column(
          mainAxisSize: MainAxisSize.min,
          children: [
            TextFormField(
              controller: _textController,
              decoration: const InputDecoration(
                filled: true,
                label: Text('Enter a username'),
              ),
              validator: (String? value) {
                if (value == null || value.isEmpty) {
                  return 'Please enter a non-empty username';
                }
                return null;
              },
            ),
            Padding(
              padding: const EdgeInsets.only(top: 20.0),
              child: ElevatedButton(
                onPressed: () {
                  if (_formKey.currentState!.validate()) {
                    widget.onUsernameSelected(_textController.value.toString());
                  }
                },
                child: const Text(
                  'Start Chat',
                  style: TextStyle(
                    fontSize: 20.0,
                    fontWeight: FontWeight.bold,
                  ),
                ),
              ),
            ),
          ],
        ),
      );
}
Now we just have to modify the content of lib/main.dart with the following:
import 'package:flutter/material.dart';
import 'package:flutter_video_chat/request_username.dart';
import 'package:uuid/uuid.dart';
import 'package:zego_uikit_prebuilt_call/zego_uikit_prebuilt_call.dart';

void main() {
  runApp(const App());
}

class App extends StatelessWidget {
  const App({super.key});

  @override
  Widget build(BuildContext context) {
    return const MaterialApp(
      title: 'Flutter Video Chat',
      home: MainScreen(),
    );
  }
}

class MainScreen extends StatefulWidget {
  const MainScreen({super.key});

  @override
  State<MainScreen> createState() => _MainScreenState();
}

class _MainScreenState extends State<MainScreen> {
  late final String userId;
  String userName = '';

  @override
  void initState() {
    super.initState();

    userId = const Uuid().v4().toString();
  }

  @override
  Widget build(BuildContext context) {
    return Scaffold(
      appBar: AppBar(
        title: const Text('Flutter Video Chat'),
      ),
      body: userName.isEmpty
          ? Center(
              child: Container(
                padding: const EdgeInsets.only(left: 30.0, right: 30.0),
                child: RequestUsername(
                  onUsernameSelected: (username) {
                    setState(() {
                      userName = username;
                    });
                  },
                ),
              ),
            )
          : ZegoUIKitPrebuiltCall(
              appID: 'your app id',
              appSign: 'your app sign',
              userID: userId,
              userName: userName,
              callID: 'test_call_id',
              config: ZegoUIKitPrebuiltCallConfig.oneOnOneVideoCall(),
            ),
    );
  }
}
In the initState() method we are generating a unique user ID using the uuid package. Then we declare the state variable userName, and depending on whether the user has entered the user name or not we show the widget that we created in the previous step or the prebuilt UIKit for the chat function, in this case we are using ZegoUIKitPrebuiltCall.
Remember that for it to work you must add your appId and your appSign, values that we find in the ZEGOCLOUD dashboard.
What's next?
As you have seen, building an application with live video is fast and easy with ZEGOCLOUD. You can check out this full tutorial for more details and tips on how to properly implement their UIKits.
Don't forget to visit their official website, where you can see all the products and services they offer. Many thanks to ZEGOCLOUD for sponsoring this article.
I hope it has been useful to you, I'll see you in the next article, happy coding!