Add Video Call functionality to your Flutter app
I am a software developer specialized in mobile apps. About a decade ago I started my career as a web developer, but I soon moved into Android native development; however for the last few years I've been building hybrid apps with Flutter. I consider myself a passionate programmer, I enjoy writing clean and scalable code. In addition to developing apps, I also have knowledge of backend services development, web development, installation and maintenance of servers, marketing applied to the growth of web applications... among other things. I also like to create video games in my free time and write about topics that interest me in the technology world: the last tech trends, experiments that I do, and topics regarding user privacy. You can find more about me, my articles and my projects on my website: davidserrano.io
Do you have some kind of application where users interact with each other? Perhaps a messaging application, a social network, or an eCommerce app? in that case, you may be interested in adding the possibility for users to establish video communication between them.
For example, if you have an eCommerce-style application, you could add the functionality of establishing a video call with the seller of the product in case the customer needs some kind of support, this increases trust in the brand and the probability that the customer will return.
Whatever the reason, adding these types of features is not easy. It implies adding and maintaining an expensive media server, knowledge of live video technologies, etc. That is why there are companies like ZEGOCLOUD that offer you to outsource this type of service.
With ZEGOCLOUD you can create any type of video call application quickly and easily, without any technical knowledge or the need to maintain expensive servers.
Full disclosure: ZEGOCLOUD contacted me and offered me a sponsorship, so after testing their product and seeing how easy it is to add live video functionality to an app, I decided to partner with them and bring you this quick tutorial on how to create a video call app in Flutter.
Create a Video Call project
The first step will be to go to the ZEGOCLOUD website and create an account if we do not have one, you can do the steps that I indicate below without having to pay anything since they offer a trial period in which you can try their product before deciding.
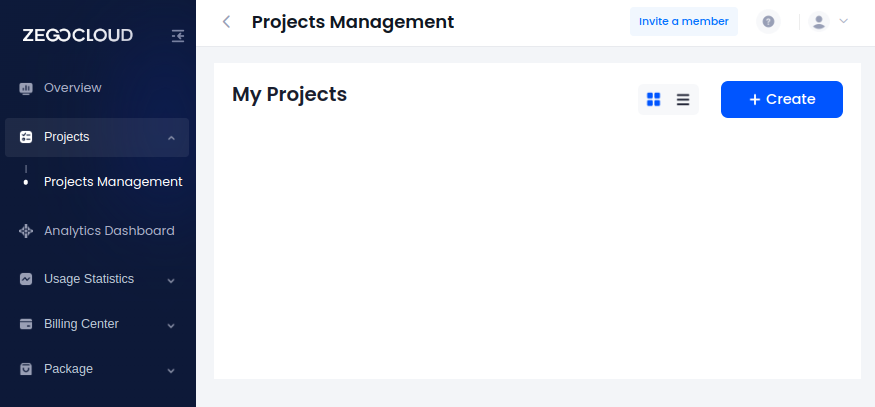
Next, we go to the Projects menu, in the side navigation bar. We will click on the Create button.
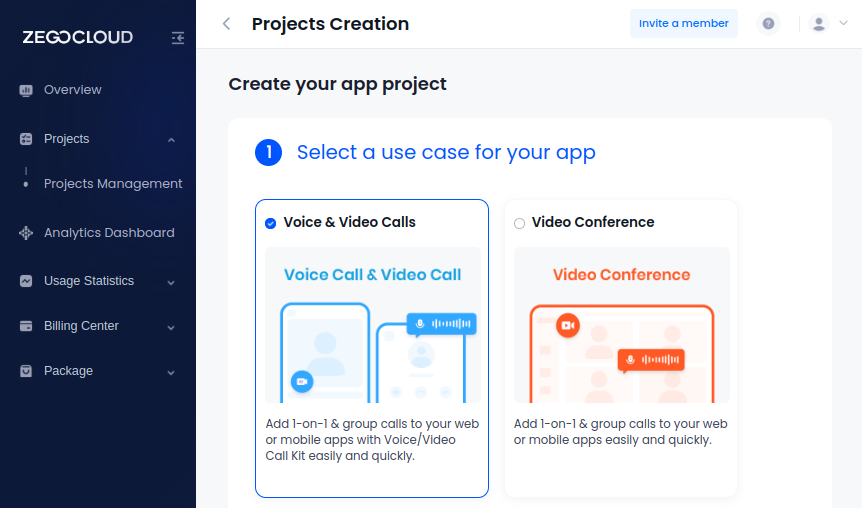
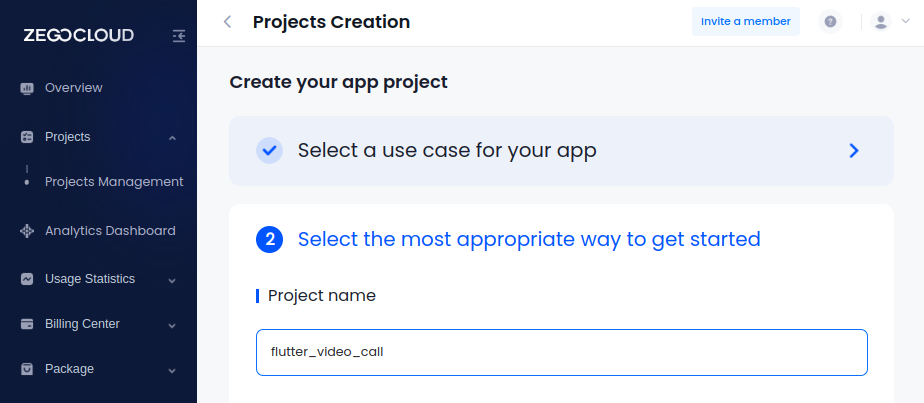
We will be presented with a list of use cases for our app, in this way the Dashboard intelligently guides us through the type of product we want to create. We will choose the first option: Voice & Video Calls.
We add a name to our project to be able to identify it later:
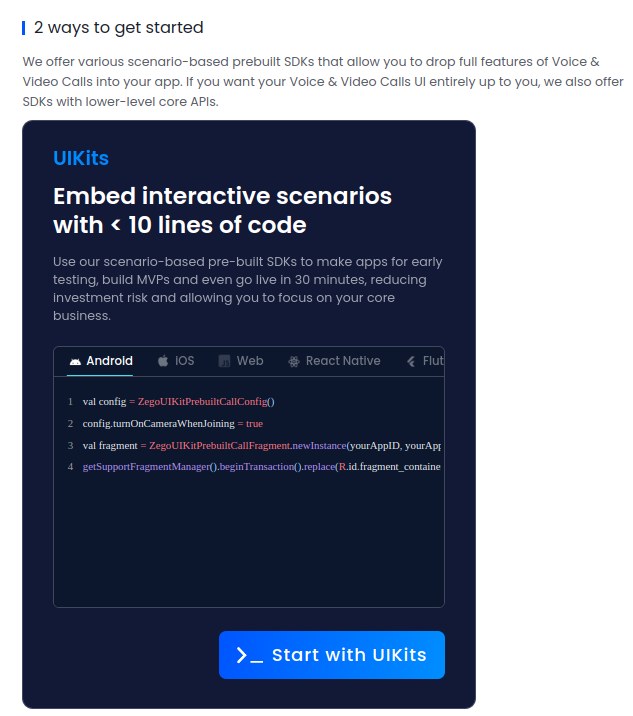
At this point we can choose between:
Use the prebuilt UiKits, which are essentially Flutter widgets with all the built-in functionality, including the visual part
Use the SDK to have more control over what we are going to implement
We will choose the first option, Start with UiKits, since we want to add our video calling functionality as quickly as possible, we will let the ZEGOCLOUD UiKit take care of requesting the relevant permissions and composing the graphical interface.
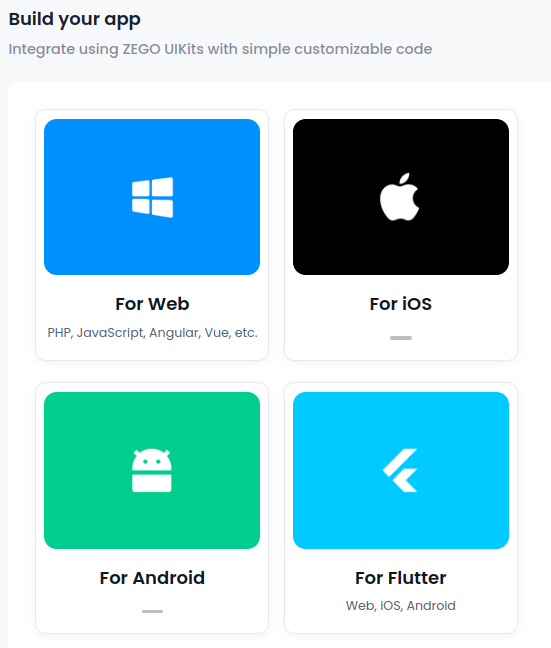
Now we will have to choose our platform, for this example we will click on For Flutter.
We already have almost everything ready, the only thing left is to click on the button located at the bottom right of the Dashboard, the one that says Save & Start to Integrate.
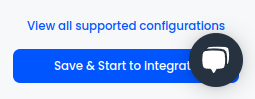
The project is now ready to be used. Note that the dashboard offers you two important values: the AppId and the AppSign. You will need to use these two values later in order to link the UiKits to this project.
Setup Flutter app
Next, we will create our Flutter application. We will set Android and iOS targets:
flutter create --platforms android,ios flutter_video_call
Now modify the following values in android/app/build.gradle:
compileSdkVersion 33minSdkVersion 21targetSdkVersion 33
And add the necessary permissions for the UiKits to work in android/app/src/main/AndroidManifest.xml:
<uses-permission android:name="android.permission.ACCESS_WIFI_STATE" />
<uses-permission android:name="android.permission.RECORD_AUDIO" />
<uses-permission android:name="android.permission.INTERNET" />
<uses-permission android:name="android.permission.ACCESS_NETWORK_STATE" />
<uses-permission android:name="android.permission.CAMERA" />
<uses-permission android:name="android.permission.BLUETOOTH" />
<uses-permission android:name="android.permission.MODIFY_AUDIO_SETTINGS" />
<uses-permission android:name="android.permission.WRITE_EXTERNAL_STORAGE" />
<uses-permission android:name="android.permission.READ_PHONE_STATE" />
<uses-permission android:name="android.permission.WAKE_LOCK" />
We will also do the same in iOS, adding the following keys in ios/Runner/Info.plist:
<key>NSCameraUsageDescription</key>
<string>We require camera access to connect to a call</string>
<key>NSMicrophoneUsageDescription</key>
<string>We require microphone access to connect to a call</string>
We have now defined the set of permissions needed for our app to work. The UiKit that we are going to use next will take care of requesting these permissions, but first, we are going to modify the pubspec.yaml file as follows:
name: flutter_video_call
description: A new Flutter project.
publish_to: 'none'
version: 1.0.0+1

environment:
  sdk: '>=2.18.6 <3.0.0'

dependencies:
  flutter:
    sdk: flutter
  cupertino_icons: ^1.0.2
  zego_uikit_prebuilt_call: ^1.4.0
  uuid: ^3.0.7

dev_dependencies:
  flutter_test:
    sdk: flutter
  flutter_lints: ^2.0.0

flutter:
  uses-material-design: true
Note that the UiKits are contained in the zego_uikit_prebuilt_call plugin. We've also added the uuid package, which will help us generate random IDs later.
We already have everything ready to start creating our application!
Create the Video Call feature
Now we'll use the Video Call UiKit to easily set up a video call between two people within our app.
Remove everything in the lib/main.dart file and add the following content:
import 'dart:math';

import 'package:flutter/material.dart';
import 'package:uuid/uuid.dart';
import 'package:zego_uikit_prebuilt_call/zego_uikit_prebuilt_call.dart';

void main() {
  runApp(const App());
}

class App extends StatelessWidget {
  const App({super.key});

  @override
  Widget build(BuildContext context) {
    return MaterialApp(
      title: 'Flutter Video Call',
      theme: ThemeData(
        primarySwatch: Colors.blue,
      ),
      home: const MainScreen(),
    );
  }
}

class MainScreen extends StatefulWidget {
  const MainScreen({super.key});

  @override
  State<MainScreen> createState() => MainScreenState();
}

class MainScreenState extends State<MainScreen> {
  static const _appId = 123456789 // Your app ID here
  static const _appSign =
      '123456789'; // Your app sign here

  static const _callId = 'my_video_call';

  late final String _userId;
  late final String _userName;

  final _random = Random();

  @override
  void initState() {
    super.initState();

    _userId = const Uuid().v4();
    _userName = 'User_${_random.nextInt(100)}';
  }

  @override
  Widget build(BuildContext context) => ZegoUIKitPrebuiltCall(
        appID: _appId,
        appSign: _appSign,
        userID: _userId,
        userName: _userName,
        callID: _callId,
        config: ZegoUIKitPrebuiltCallConfig(),
      );
}
Some points to consider about this implementation:
As you can see, the video call functionality is contained in the MainScreen widget, which is added normally to the App Widget, which is the one that defines the root MaterialApp of our application
First, we define in the _appId and _appSign variables the values that the ZEGOCLOUD Dashboard has provided us. In this example they are defined in this way for simplicity, but in a real application I strongly advise you to get these values by calling your secure server. Do not leave these values hardcoded in your application's source code.
To identify users, we create a random ID and a random name for them as well. I do it this way for simplicity, but in the case of your application you could take, for example, the ID with which you identify users within your system and the name that the user has set in their personal data area.
Finally, we use the ZegoUIKitPrebuiltCall widget with all the above data
Now try running this app on two different devices. You will notice that the permissions are requested automatically, and you will also see the necessary controls to manage the call on the screen; all provided generically by the ZegoUIKitPrebuiltCall widget.
What else can you do with ZEGOCLOUD?
As you can see, with the UiKit you can create applications with live video functionalities in a very simple way. If you want you can see this tutorial on its official website where more details are explained on how to use this product.
Also, you can check out their website for more information if you haven't already.
I hope this tutorial has been useful to you, I'll see you in the next article.
Happy coding!