Add support for voice calls in your Flutter app
I am a software developer specialized in mobile apps. About a decade ago I started my career as a web developer, but I soon moved into Android native development; however for the last few years I've been building hybrid apps with Flutter. I consider myself a passionate programmer, I enjoy writing clean and scalable code. In addition to developing apps, I also have knowledge of backend services development, web development, installation and maintenance of servers, marketing applied to the growth of web applications... among other things. I also like to create video games in my free time and write about topics that interest me in the technology world: the last tech trends, experiments that I do, and topics regarding user privacy. You can find more about me, my articles and my projects on my website: davidserrano.io
The establishment of voice calls will allow your users to communicate with each other within your app as if they were on a phone call, but without actually being.
It might interest you, for example, if you are creating some kind of messaging application, maybe a one-on-one chat messaging app, and you would like to add the possibility to your users of establishing a voice call besides sending text messages. It can also be useful as a tool to offer support to your users by your agents, or also as a training mechanism.
In any case, adding this type of features to an app is not an easy task, given the necessity of having a backend specialized in live voice transmission, encoding and decoding data, etc.
For this reason, in this article I have partnered with ZEOGCLOUD, a company that specializes in offering this type of service to its users. With their pre-built UIKits you will be able to add voice calls extremely quickly to your application without you having to know anything about any communication protocol. You just have to add their library and use one of its predesigned widgets, and that's it.
If you want to see it for yourself, you can register completely free of charge and start using their products before making any payment or giving any bank details. To do this, go to their official page and register yourself. Once that is done, follow the steps below to add support for voice chats to your application:
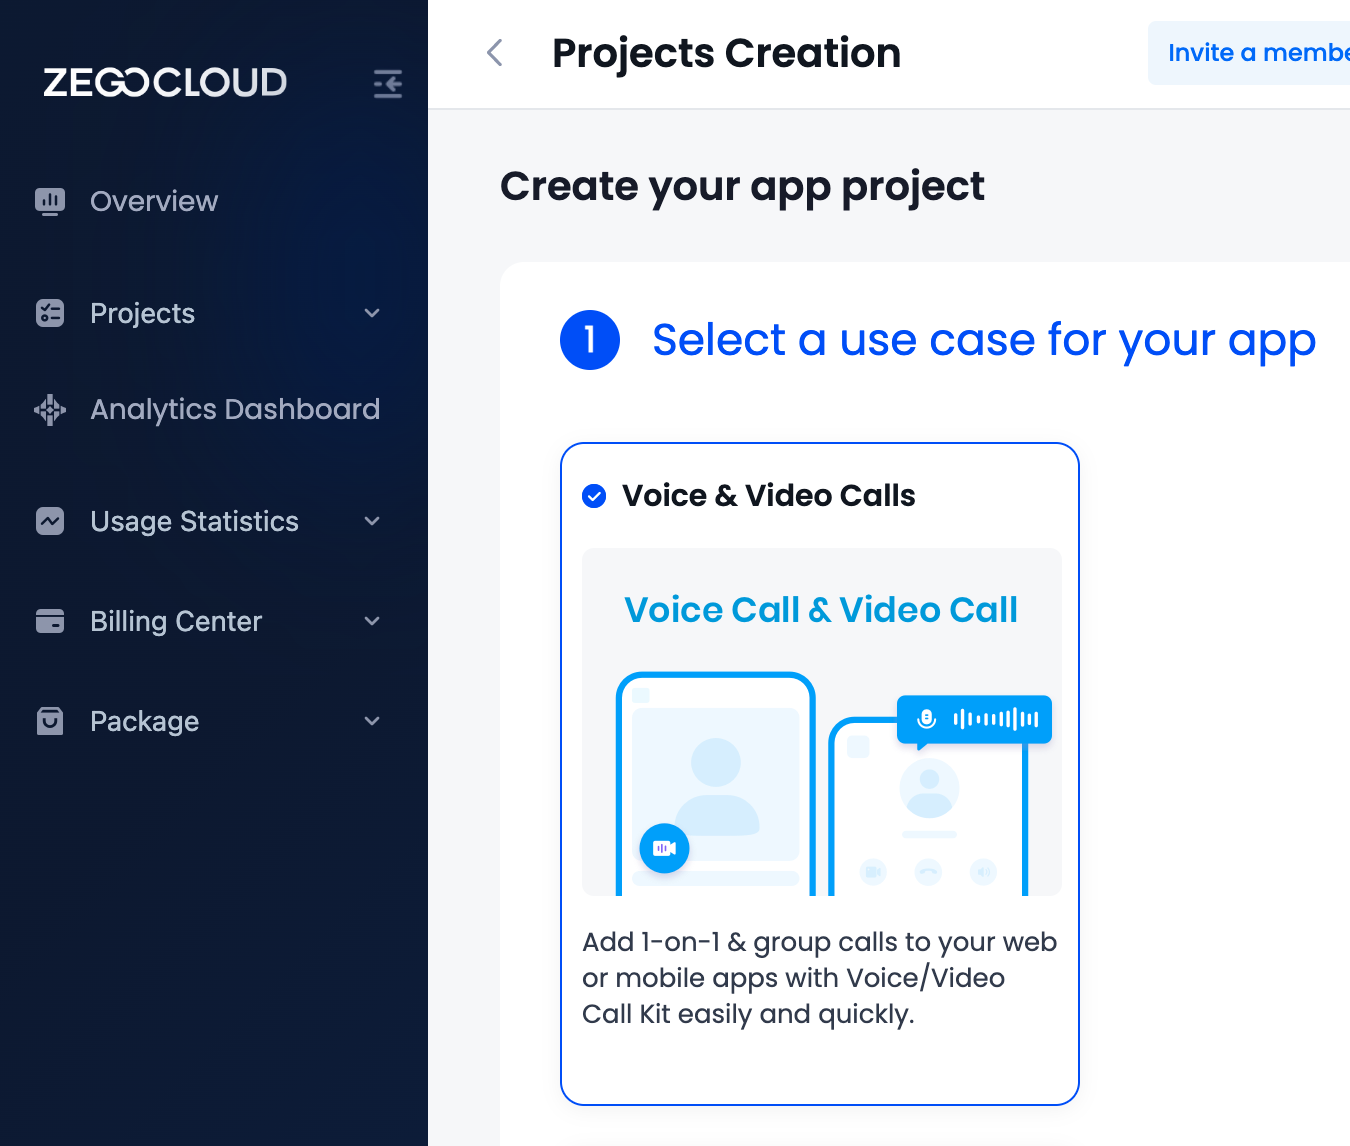
In the dashboard, in the Overview section, click on Create your project:

Then you will be presented with a set of use cases for your app. For this particular example, we will select Voice & Video Calls:
The next step will be to set a name for our new project. Then you will have two options:
Either use their SDK, with which you can fine-tune how the integration will work on your app, or...
Use a pre-built UIKit, which will allow us to use a built widget with all the functionality that we will need, this includes the visual part, the request for permissions, etc
As we want to add this feature as simple and quick as possible, we will select Start with UIKits:

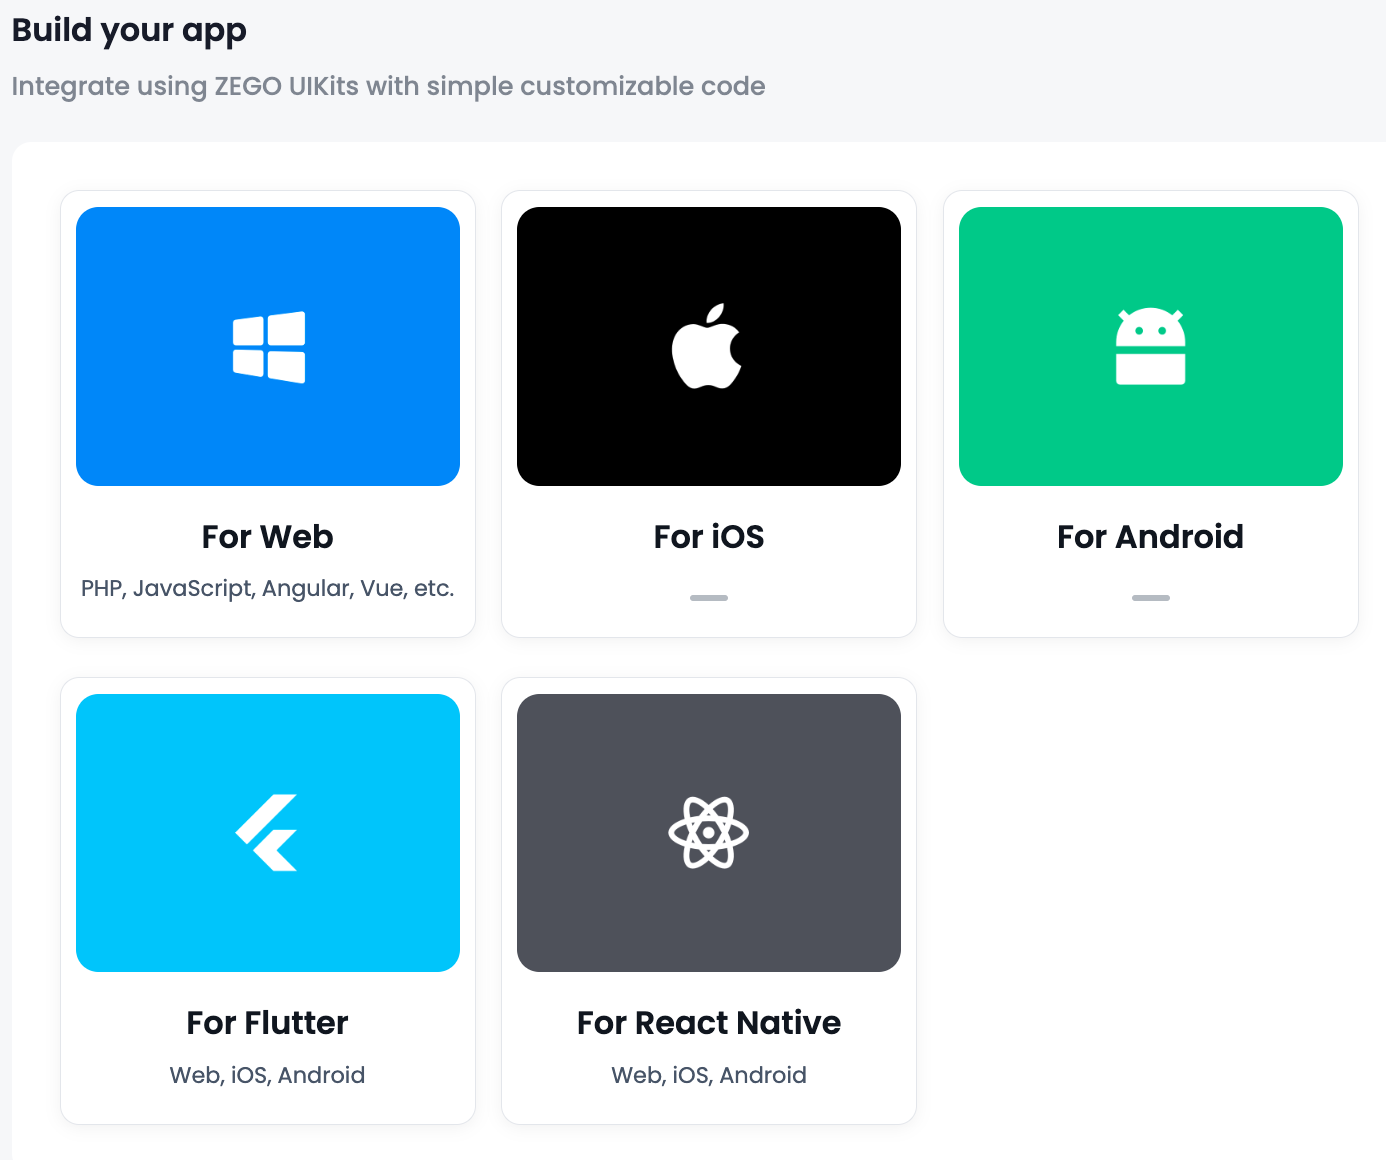
The next step will be the platform selection. Note that you can integrate this product into many different platforms. For this example, we will select For Flutter:
At this point everything is ready to start, so click on the button on the bottom left corner of the window with the label Save & Start to integrate:
Once you click on the above button you can start adding this feature to your app. Note that you will need the AppID and the AppSign to connect your app with the project you just created. Make sure to not add this sensible data in the source code of your apps, instead fetch it from your secure backend.
Now let's create a new flutter app that supports Android and iOS:
flutter create --platforms android,ios flutter_voice_support
Add the following dependencies:
flutter pub add uuid zego_uikit_prebuilt_call
We'll use uuid to generate random IDs (for the sake of simplicity, but you should use your ID system in your real app) and zego_uikit_prebuilt_call is the built widgets provided by ZEGOCLOUD.
Before starting to code, set the minSdkVersion to 21 in android/app/build.gradle. Also, make sure that compileSdkVersion is set to 33.
Also, add the requirements permissions in android/app/src/main/AndroidManifest.xml:
<uses-permission android:name="android.permission.ACCESS_WIFI_STATE" />
<uses-permission android:name="android.permission.RECORD_AUDIO" />
<uses-permission android:name="android.permission.INTERNET" />
<uses-permission android:name="android.permission.ACCESS_NETWORK_STATE" />
<uses-permission android:name="android.permission.BLUETOOTH" />
<uses-permission android:name="android.permission.MODIFY_AUDIO_SETTINGS" />
<uses-permission android:name="android.permission.WRITE_EXTERNAL_STORAGE" />
<uses-permission android:name="android.permission.READ_PHONE_STATE" />
<uses-permission android:name="android.permission.WAKE_LOCK" />
We need also to set the microphone permission for iOS builds in ios/Runner/Info.plist:
<key>NSMicrophoneUsageDescription</key>
<string>We require microphone access to connect to a call</string>
Substitute the contents of lib/main.dart with the following. You can find some explanations of what I'm doing within the line comments:
import 'package:flutter/material.dart';
import 'package:uuid/uuid.dart';
import 'package:zego_uikit_prebuilt_call/zego_uikit_prebuilt_call.dart';

void main() {
  runApp(const App());
}

class App extends StatelessWidget {
  const App({super.key});

  @override
  Widget build(BuildContext context) {
    return MaterialApp(
      title: 'Flutter Voice Call',
      theme: ThemeData(
        primarySwatch: Colors.blue,
      ),
      home: const CallPage(),
    );
  }
}

class CallPage extends StatefulWidget {
  const CallPage({Key? key}) : super(key: key);

  @override
  State<CallPage> createState() => _CallPageState();
}

class _CallPageState extends State<CallPage> {
  // We need to set an ID for this call. For this example we will use
  // this simple string.
  final String _callId = '123456789';
  late final String _userId;

  @override
  void initState() {
    super.initState();

    // Create an ID for this user. In your real app you could use your
    // real user ID.
    _userId = const Uuid().v4();
  }

  @override
  Widget build(BuildContext context) {
    return ZegoUIKitPrebuiltCall(
      appID: , // Set the appID found in your Dashboard
      appSign: , // Set the appSign found in your Dashboard
      userID: _userId,
      userName: 'user_name',
      callID: _callId,
      // Here we use the oneOnOneVoiceCall() configuration, which auto-configures
      // the UIKit to make voice calls. It will take care of requesting
      // permissions and to display the UI.
      config: ZegoUIKitPrebuiltCallConfig.oneOnOneVoiceCall(),
    );
  }
}
Try to execute the app on two devices. If all the configuration is correct, you should be able to do a voice call between the two.
As you have seen, with the ZEGOCLOUD UIKit it is quite easy to add a simple voice chat to your application. Visit this link for more information on adding voice chat support to your app.
I hope this article has been useful to you, and many thanks to ZEGOCLOUD for sponsoring this type of content.
I'll see you in the next article, happy coding!